Sunday, December 11, 2011

Attempting December Part 1

Yes I do realize I am late, which is what seems to be happening a lot to me lately, but a girl can only do so much. Let me just give you a little background. My family owns a UPS Store, and as you could imagine the month of December finds us quite busy. I was very excited when Ali mentioned December Daily a couple months ago, this will be my 3rd year participating, so I decided to get things done early and start my basic pages in September. Things kept getting pushed back and I found myself with a lot less free time. So here it is almost half way through December just finishing my foundation pages.
I was trying to find things to simplify this project for me. We put in a lot of unpaid overtime, late nights, exhausting days, and find little time for December Daily, but I love looking back through my albums from past years. I love celebrating and documenting the season, so I decided to adopt Ali's Layout from last year, hoping to relieve some of the stress of the holiday.
I know I will not be able to keep up like a lot of people (I find a couple empty spots in my albums, but that's okay with me. I love the things that I do have, and will cherish them for years to come) but I am up for the challenge. I hope you will come along with me for the ride and maybe even celebrate a bit of Christmas in July :). Each transparency will be accompanied by a Daily template from Ali.
So here we go. Most of my Overlays come from Hambly and I have stuck with just a handful of different products, some things from my stash, and of course ideas and products from Ali!
(Sorry I'm not so good at remembering exact product names)


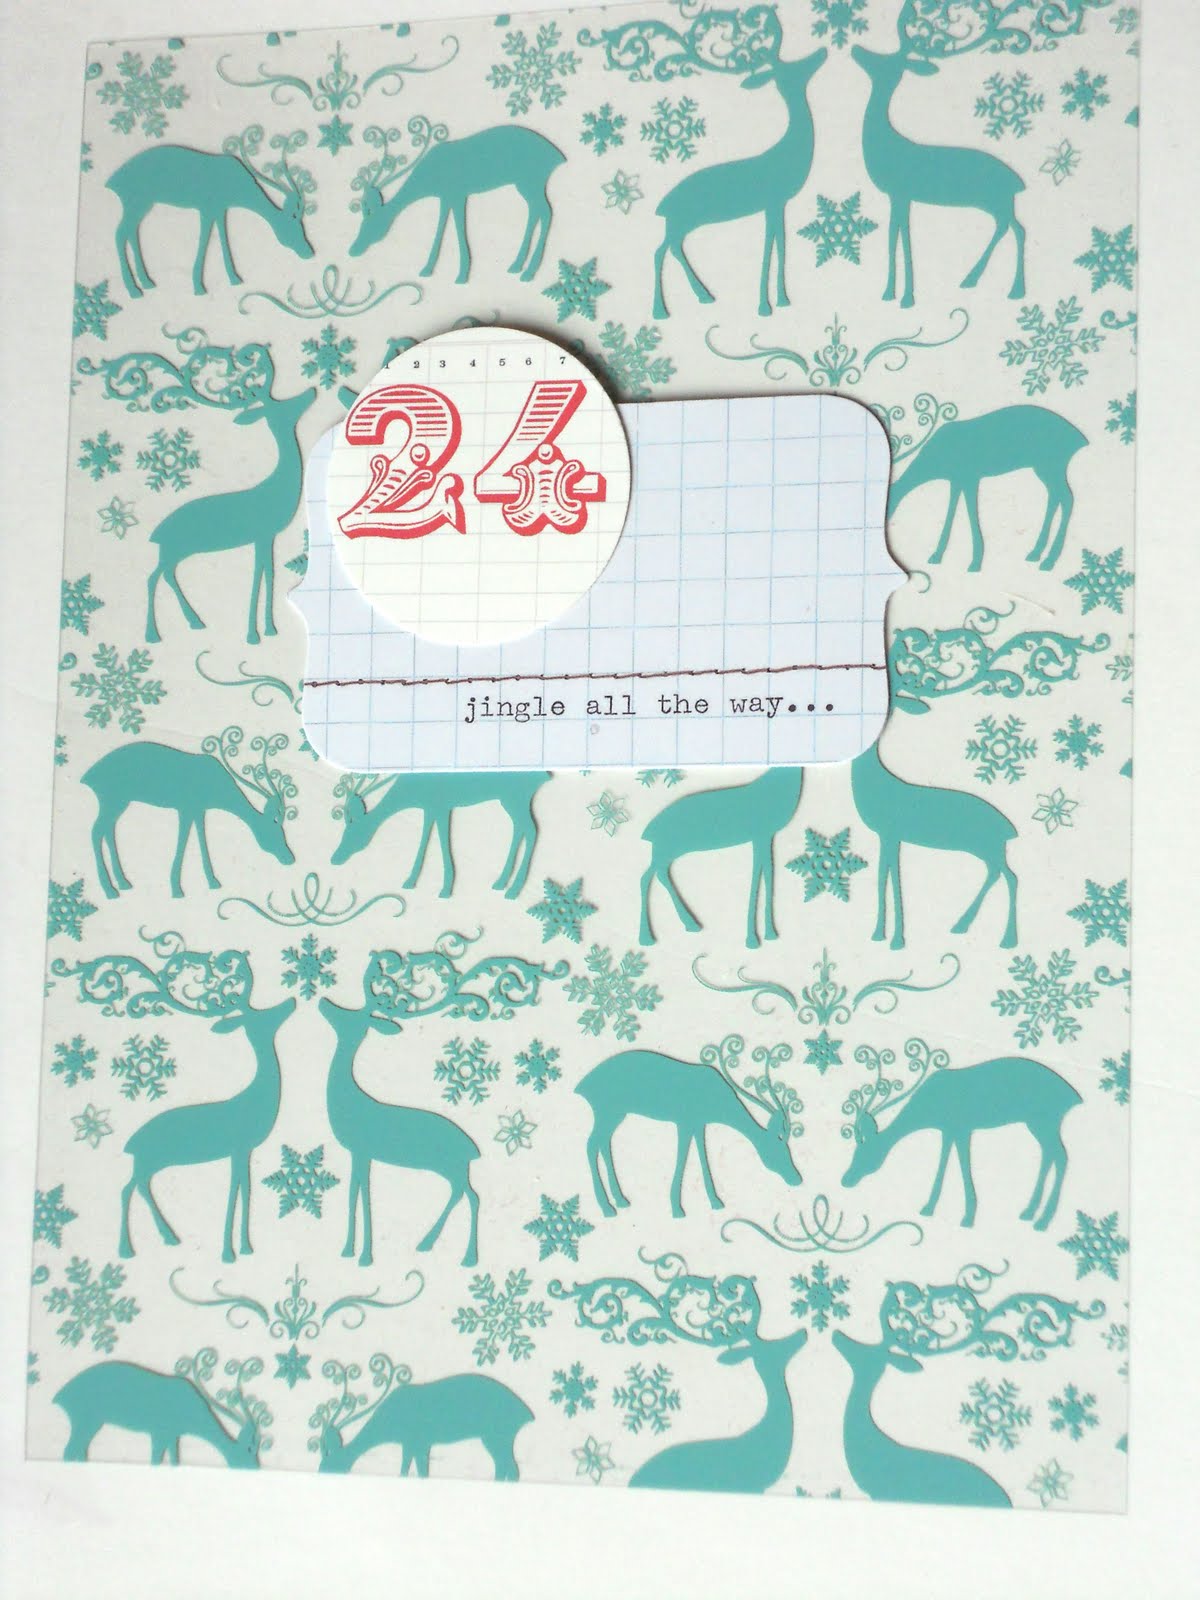
Day 1: Hambly Overlay, Evalicious December Tag, Bananafish Studios Number Tag.


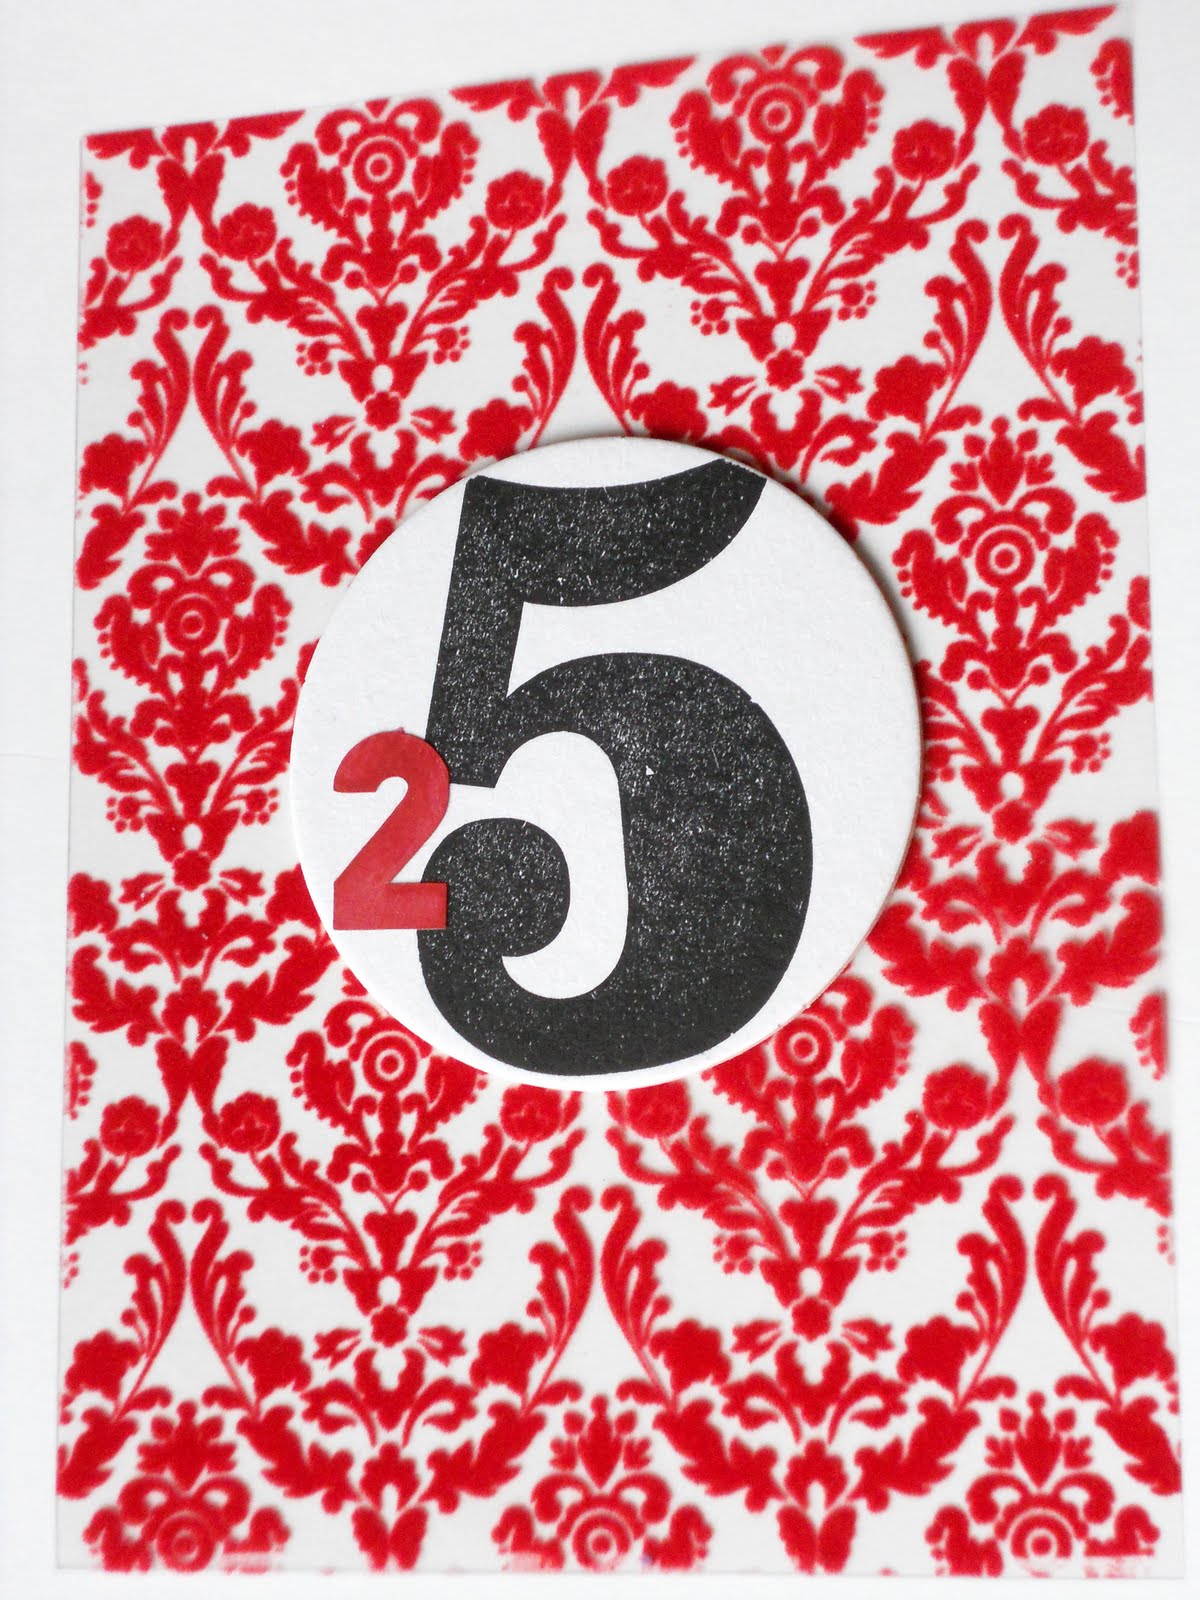
Day 2: Hambly Overlay, Red Bird Ink Number Coaster.

Day 3: I think It's an Anna Griffin Overlay, Evalicious Tag, Bananafish Studios Number Tag.

Day 4: Hambly Overlay, Red Bird Ink Number Coaster.

Day 5: Vellum, Tim Holtz Metal Numbers, Fiskars Extra Large Star Punch, Corrugated Paper.

Day 6: Hambly Overlay, Evalicious December Tag, Bananafish Studios Round Number Tag.

Day 7: Hambly Overlay, Red Bird Ink Number Coaster.

Attempting December Part 2

Day 8: Tim Holtz metal numbers, stars punched from corrugated paper with fiskars extra large star punch, on vellum.

Day 9: Hambly overlay, Bananafish Studios Tag, Glitter Stickers I believe were from Making Memories a couple years ago.

Day 10: Hambly Red Grid Overlay, Old Basic Grey Chipboard letters, Red Bird Ink Number Coaster.

Day 11: Hambly Overlay, Evalicious Tag, Banana fish Number Tag.

Day 12: Baseball Sheet Protector, Ormolu Tag.

Day 13: Hambly Overlay, Red Bird Ink Number Coaster, Making Memory glitter alphabet.

Day 14: Making Memories Overlay, Evalicious December Tag, Bananafish Studio Number Tag.

Day 15: Hambly Overlay, Ormolu Tag, Making Memories Glitter Alphabet.
Day 16: Hambly Overlay, Red Bird Ink Number Coaster, Basic Grey Chipboard Alphabet

Day 17: Tim Holtz Metal Numbers, Star punched from corrugated paper with the extra large star punch from Fiskars.

Day 18: Hambly Overlay, Bananafish Studios Tag, Jillibean Corrugated Alphabet.

Day 19: Hambly Overlay, Red Bird Ink Number Coaster, Making Memories Glitter Alphabet.

Day 20: Tim Holtz Metal Numbers, Stars punched from Fiskars extra large star punch.

Day 21: Hambly Overlay, Red Bird Ink Number Coaster, Not sure who the stamp set was made by, but it is an older one, Stamped with Colorbox Cranberry Ink.

Day 22: Baseball card sheet protector, Basic Grey Chipboard Alphabet, Making Memories Glitter Alphabet.

Day 23: Hambly Overlay, Bananafish Studios Tag, Ormolu button.

Day 24: Hambly Overlay, Evalicious Tag, Bananfish Studios Circle Numbers.

Day 25: I believe it is Anna Griffin Overlay, Red Bird Ink Number Coasters, Ormolu 2.


Thursday, November 24, 2011

Very Grateful

Silent gratitude isn’t much use to anyone.”
-G. B. Stern


Happy Thanksgiving!

Sunday, October 30, 2011

Toil & Trouble


Here we go! Happy Halloween! This is as much Halloweeny as I usually get. Haunted houses, corn mazes, scary movies, and dressing up usually aren't in my schedule this time of year (maybe I should change that, hmmm) Yes, I know Halloween is tomorrow, but I thought I would show you a little of my Halloween decor.


Hope you all have a wonderful and safe Halloween!

Wednesday, October 26, 2011

Plucked From A Raven

In my quest (yes it officially was a quest) for the perfect Halloween wreath I found myself at the final store with hopes dashed. What did I want you may ask? Well, I wanted a wreath just the right size to fit in my wonderful antique window, (am I obsessed with that window, no way I've just stewed over how I want to decorate it for the next 6 months ;) black, feathered, and a little spark of fun. Now was that to much to ask for? I would think not. The retail gurus and I were not on the same page this year (Usually they have been pretty good to me and the internet doesn't hurt!).
So there I was all mopey browsing pier 1 when an idea popped into my mind. My eyes had met with THE BOA! I've made fresh Christmas wreaths before, I thought to myself, and there it was I snatched up those boas and couldn't get home fast enough.


So all you really need is a boa of any color, a wreath form, (some people use pool noodles, or they have something similar in the plumbing section at a home improvement store, I think) wire, and spray paint (optional).
I thought it was so fun I actually did it twice. The first time I was able to see the white Styrofoam form, so I took it apart to spray paint it black. I think it was actually eating away at the foam.

All I did was start the boa on the form and wrap the wire around the boa and the form, repeat, repeat, repeat until it is all done. Voila it is Finito!

Want to see how it all comes together? Stop back soon!

Sunday, October 23, 2011

Oh I Have A Blog?

Sorry for the long silence, there have been quite drastic changes in my life recently. Not exactly pleasant, but as the world would think necessary. Oh how I hate growing up :(. When I was little I remember always wishing that I was a grown up. Hmmm must learn how to retract those memories.
Well here is the "reveal" to my sneaky antique window. It's pretty simple, but sometimes simple is good right (okay maybe it was a [whole lot of] a little bit of laziness).


So here are a few close-ups. Gotta love those close ups!


Yes I do realize that it is almost Halloween (how did that happen?) and I should be sportin' all the dark mystical all hallows eve decor, but I promise that will come (maybe after Thanksgiving). Oh and did I mention something unpleasantly big happened in my life? Just had to throw that in again (CHECKLIST # 23 must give some reason for copping out after my second post. CHECK!)

Thursday, August 18, 2011

Shove it All in a Wooden Box

I took a floral design course a while back, and I will not lie, I was not the most creative student. In recent weeks I have poured over picture after picture of beautiful arrangements and wish I could make something as beautiful. I thought, what the heck I will give it another try! How hard is it to shove everything in a wooden box? ;)

So here we go!


I wanted to have simple colors so I stuck to white and green. I was able to score most of my flowers for a good deal at Hobby Lobby (50% off). Never pay full price for flowers they usually go on sale regularly. I would recommend purchasing more flowers than you think you need (plus it makes sure you get the sale price:). I had to go back to the store a couple times. The first time I didn't get enough and the second time I wanted to exchange for something else. If you do have to many you can always take them back.

I got Calla Lilies, Hydrangeas, Baby's Breath, and flowering branches. I went back to get some white roses, and trailing greenery. I picked a nice dark distressed wooden container and cut floral foam to fit. It took me a while to decide and arrange my flowers putting them in and taking them out. At the end my floral foam was barely holding together. I have thought about cutting a new piece, but I haven't gotten to it yet.


Just to put in a plug for Hobby Lobby flowers I LOVE them. I'm not a fan of the fabric flowers to me they look too fake. The flowers that I purchased were made more of a plasticy material making them look very real.

All in all I think it turned out pretty well for a basic design! Just looking at the pictures makes me want to do just a teenie bit of tweaking.


Monday, August 15, 2011

The First Attempt

The first post on my first blog! Hello blogworld! Well I guess I will introduce you to the WHY. I don't really know much about blogging or about writing, it's the inspiration. Most of the things I love and try are not original they are found and attempted. Some of those attempts will work and some will not. I want to share my failures along with my success. This is what I want to accomplish with this blog, to realize everyone fails and that's okay. Fear of failure has been quite prevalent in my life recently, so here's to fearlessness, or less fear (let's not get ahead of ourselves :))

So here's to the first attempt!

On my way to a wedding reception a local antique store caught my eye, and what to my surprise, old windows at an amazing price! Inspiration from the one and only Pinterest had evolved into a wonderful idea. Here is a sneak peek to the awesomeness!